
€4.98
Priemerné hodnotenie:0/5(0x)
Vlastnosti a parametre výrobku
Skúsenosti užívateľov
Otázky a odpovede
Dokumentácia
Popis
Vlastnosti a parametre výrobku
| Séria (domáca technika) | Homematic IP |
|---|---|
| Cloudová integrácia (Smart Home) | Conrad Connect (je potrebná samostatná základná stanica) |
| Bezdrôtové zariadenie (Smart Home) | Hersteller-Spezifisch |
| Spôsob ochrany | IP20 |
| Vonkajšia šírka | 60 mm |
| Vonkajšia výška | 60 mm |
| Rozmer, hĺbka | 12 mm |
| Hmotnosť | 11 g |
| Tok signálu (konektor A na B) | Obojsmerný (bi) |
| Kategória výrobku | Výmenný rámček |
Skúsenosti a názory zákazníkov
- Skúsenosti užívateľov nie sú k dispozícii.
Otázky užívateľov
- Užívatelia k tomuto výrobku zatiaľ nemali žiadne otázky.
Dokumentácia
Podmienky používania dokumentácie
1
Inhaltsverzeichnis 1 Hinweise zur Anleitung …22 Gefahrenhinweise …23 Funktion und Geräteübersicht …44 Allgemeine Informationen …55 Montage …65.1 Klebestreifenmontage …65.2 Schraubmontage …76 Wartung und Reinigung …87 Technische Daten …9
2
Hinweise zur Anleitung 1 Hinweise zur Anleitung Lesen Sie diese Anleitung sorgfältig, bevor Sie den Home-matic IP Wechselrahmen montieren. Bewahren Sie die Anleitung zum späteren Nachschlagen auf! Wenn Sie den Rahmen anderen Personen zur Nutzung überlassen, übergeben Sie auch diese Bedienungsanleitung.
Benutzte Symbole: Achtung! Hier wird auf eine Gefahr hingewiesen.
Hinweis.Dieser Abschnitt enthält zusätzliche wichtige In-formationen!
2 Gefahrenhinweise Bei Sach- oder Personenschäden, die durch un-sachgemäße Handhabung oder Nichtbeachten der Gefahrenhinweise verursacht werden, über-nehmen wir keine Haftung. In solchen Fällen er-lischt jeder Gewährleistungsanspruch! Für Folge-schäden übernehmen wir keine Haftung!
Verwenden Sie den Rahmen nicht, wenn er von au-ßen erkennbare Schäden aufweist. Lassen Sie den Rahmen im Zweifelsfall von einer Fachkraft prüfen.
3
Gefahrenhinweise Aus Sicherheits- und Zulassungsgründen (CE) ist das eigenmächtige Umbauen und/oder Verän-dern des Rahmens nicht gestattet.
Verwenden Sie den Rahmen nur in Innenräumen und setzen Sie ihn keinem Einfluss von Feuchtig-keit, Vibrationen, ständiger Sonnen- oder anderer Wärmeeinstrahlung, übermäßiger Kälte und kei-nen mechanischen Belastungen aus.
Der Rahmen ist kein Spielzeug, erlauben Sie Kin-dern nicht damit zu spielen. Lassen Sie das Verpa-ckungsmaterial nicht achtlos liegen, Plastikfolien/ -tüten, Styroporteile, etc., könnten für Kinder zu einem gefährlichen Spielzeug werden.
Jeder andere Einsatz als der in dieser Bedie-nungsanleitung beschriebene ist nicht bestim-mungsgemäß und führt zu Gewährleistungs- und Haftungsausschluss. Dies gilt auch für Umbauten und Veränderungen. Der Rahmen ist ausschließ-lich für den privaten Gebrauch gedacht.
Der Rahmen ist nur für den Einsatz in wohnungs-ähnlichen Umgebungen geeignet.
4
Funktion und Geräteübersicht 3 Funktion und Geräteübersicht Der Homematic IP Wechselrahmen – schmal kann uni-versell für die Montage von batterieversorgten Geräten im 55er-Format (z. B. Homematic IP Wandthermostat oder Homematic IP Wandtaster – 2-fach) verwendet werden. Die Geräte können einfach und ohne Werkzeug in den Wechselrahmen eingesetzt werden.
Die Montage des Wechselrahmens gestaltet sich durch Ver-schrauben oder Aufkleben mit den mitgelieferten Schrau-ben und Klebestreifen auf unterschiedlichen Untergründen wie Mauerwerk, Möbeln, Fliesen oder Glas sehr einfach und bietet eine hohe Flexibilität bei der Wahl des Montageortes. Durch den schmalen Rahmen ist auch eine Montage an Positionen mit geringem Platzangebot möglich.
Geräteübersicht (s. Abbildung 1): (A) Rastnasen(B) Schraublöcher
5
Allgemeine Informationen 4 Allgemeine Informationen Dieses Gerät ist Teil des Homematic IP Systems und kann mit allen Homematic IP Geräten im 55er-Format kombi-niert werden (s. „5 Montage“ auf Seite 6).Gleichermaßen können auch batteriebetriebene Geräte im 55er-Format anderer Systeme (wie z. B. HomeMatic, MAX! oder FS20) in den Wechselrahmen eingesetzt wer-den.
Alle technischen Dokumente und Updates finden Sie stets aktuell unter www.eQ-3.de.
Die vollständige Konformitätserklärung finden Sie unter www.homematic-ip.com.
6
Montage 5 Montage Bitte lesen Sie diesen Abschnitt erst vollständig, bevor Sie mit der Montage beginnen.
Sie können den Wechselrahmen entweder- mit den mitgelieferten doppelseitigen Klebestrei-fen oder- mit den mitgelieferten Schraubenan der Wand befestigen.
5.1 KlebestreifenmontageUm den Wechselrahmen mit den Klebestreifen zu mon-tieren, gehen Sie wie folgt vor: – Wählen Sie einen beliebigen Montageort aus.
Achten Sie darauf, dass der Montageuntergrund glatt, eben, unbeschädigt, sauber, fett- sowie lö-sungsmittelfrei und nicht zu kühl ist, damit der Klebestreifen langfristig haften kann.
– Befestigen Sie die Klebestreifen (C) auf der Rückseite des Wechselrahmens in den dafür vorgesehenen Markierungen (s. Abbildung 2).- Entfernen Sie die Folie von den Klebestreifen.- Drücken Sie jetzt den Wechselrahmen mit der Rückseite an die gewünschte Position an die Wand.
7
Montage – Setzen Sie das gewünschte Homematic IP Gerät (z. B. einen Homematic IP Wandthermostaten) in den Wechselrahmen ein (s. Abbildung 3). Achten Sie darauf, dass die Rastnasen (A) vollständig ein-rasten.
Wie Sie das eingesetzte Gerät ins Homematic IP System integrieren können, entnehmen Sie bitte der jeweiligen Bedienungsanleitung.
5.2 SchraubmontageUm den Wechselrahmen mithilfe der Schrauben zu montieren, gehen Sie wie folgt vor: – Wählen Sie einen geeigneten Montageort aus.
Stellen Sie sicher, dass an der ausgewählten Posi-tion in der Wand keine Leitungen verlaufen!
– Halten Sie den Wechselrahmen an die gewünschte Montageposition.- Zeichnen Sie zwei Bohrlöcher (B) anhand des Wechselrahmens in einem Abstand von 30 mm mit einem Stift an der Wand an (s. Abbildung 4).- Bohren Sie die vorgezeichneten Löcher.
Bei Steinwänden verwenden Sie einen 5 mm Bohrer für die Dübel. Bei Holzwänden können Sie
8
Wartung und Reinigung einen 1,5 mm Bohrer verwenden, um das Eindre-hen der Schrauben zu erleichtern.
– Montieren Sie den Wechselrahmen durch Eindre-hen der mitgelieferten Dübel und Schrauben (s. Abbildung 5).- Setzen Sie das gewünschte Homematic IP Gerät (z. B. einen Homematic IP Wandthermostaten) in den Wechselrahmen ein (s. Abbildung 3). Achten Sie darauf, dass die Rastnasen (A) vollständig ein-rasten.
Wie Sie das eingesetzte Gerät ins Homematic IP System integrieren können, entnehmen Sie bitte der jeweiligen Bedienungsanleitung.
6 Wartung und Reinigung Das Produkt ist für Sie wartungsfrei. Überlassen Sie eine Wartung oder Reparatur einer Fachkraft.
Reinigen Sie das Produkt mit einem weichen, sauberen, trockenen und fusselfreien Tuch. Für die Entfernung von stärkeren Verschmutzungen kann das Tuch leicht mit lauwarmem Wasser angefeuchtet werden. Verwenden Sie keine lösemittelhaltigen Reinigungsmittel. Das Kunst-stoffgehäuse und die Beschriftung können dadurch an-gegriffen werden.
9
Technische Daten 7 Technische Daten Geräte-Kurzbezeichnung: HmIP-SF-2Schutzart: IP20Verschmutzungsgrad: 2Umgebungstemperatur: 0 bis 50 °CAbmessungen (B x H x T): 60 x 60 x 12 mmGewicht: 11 g Technische Änderungen vorbehalten.
EntsorgungshinweisGerät nicht im Hausmüll entsorgen! Elektroni-sche Geräte sind entsprechend der Richtlinie über Elektro- und Elektronik-Altgeräte über die örtlichen Sammelstellen für Elektronik-Altgeräte zu entsorgen.
KonformitätshinweisDas CE-Zeichen ist ein Freiverkehrszeichen, das sich ausschließlich an die Behörden wendet und keine Zusicherung von Eigenschaften beinhaltet.
Bei technischen Fragen zum Gerät, wenden Sie sich bitte an Ihren Fachhändler.
10
Package contents QuantityDescription 1Homematic IP Clip-on Frame – small 2Double-sided adhesive strips 2Screws 3.0 x 30 mm 2Plugs 5 mm 1User manual Documentation © 2017 eQ-3 AG, GermanyAll rights reserved. Translation from the original version in Ger-man. This manual may not be reproduced in any format, either in whole or in part, nor may it be duplicated or edited by electronic, mechanical or chemical means, without the written consent of the publisher.Typographical and printing errors cannot be excluded. However, the information contained in this manual is reviewed on a regular basis and any necessary corrections will be implemented in the next edition. We accept no liability for technical or typographical errors or the consequences thereof.All trademarks and industrial property rights are acknowledged.Printed in Hong KongChanges may be made without prior notice as a result of techni-cal advances.
151976
Version 1.0 (11/2017)
11
Table of contents 1 Information about this manual…122 Hazard information …123 Function and device overview …144 General information …155 Mounting …155.1 Adhesive strip mounting …165.2 Screw mounting…176 Maintenance and cleaning …187 Technical specifications …18
12
Information about this manual 1 Information about this manual Please read this manual carefully before beginning in-stallation of your Homematic IP Clip-on Frame. Keep the manual so you can refer to it at a later date if you need to. If you hand over the frame to other persons for use, please hand over the operating manual as well.
Symbols used: Attention! This indicates a hazard.
Please note:This section contains important additional infor-mation.
2 Hazard information We do not assume any liability for damage to property or personal injury caused by improper use or the failure to observe the hazard informa-tion. In such cases, any claim under warranty is extinguished! For consequential damages, we as-sume no liability!
Do not use the frame if there are signs of damage. If you have any doubts, have the frame checked by an expert.
13
Hazard information For safety and licensing reasons (CE), unauthor-ized change and/or modification of the frame is not permitted.
The frame may only be operated indoors and must be protected from the effects of moisture, vibrations, solar or other methods of heat radia-tion, cold and mechanical loads.
The frame is not a toy; do not allow children to play with it. Do not leave packaging material lying around, plastic films/bags, pieces of polystyrene etc., can be dangerous in the hands of a child.
Using the device for any purpose other than that described in this operating manual does not fall within the scope of intended use and shall invalidate any warranty or liability. This also applies to any conversion or modification work. The frame is intended for private use only.
The frame may only be operated within residen-tial buildings.
14
Function and device overview 3 Function and device overview The Homematic IP Clip-on Frame – small is suitable for universal installation of battery operated devices with the dimensions of 55 x 55 mm (e.g. Homematic IP Wall Thermostat or Homematic IP Wall-mount Remote Control – 2 buttons). The devices can be put into the clip-on frame easily and without any tools.
The clip-on frame is mounted very easily using the supplied screws or adhesive strips. It is compatible with a number of different surfaces including furniture, brick walls, tiles or glass and is very flexible when selecting a mounting location. Thanks to the small frame, devices can also be installed at locations with little available space.
Device overview (see figure 1): (A) Spring latches(B) Screw holes
15
General information 4 General information This device is a component of the Homematic IP smart home system and can be combined with all devices with the dimensions of 55 x 55 mm (see sec. “5 Mounting” on page 15).Also battery operated devices with the dimensions of 55 x 55 mm of other systems (e.g. Homematic, MAX!, etc.) can be used with the clip-on frame.
All current technical documents and updates are provided at www.eQ-3.com.
You can find the full declaration of conformity at www.homematic-ip.com.
5 Mounting Please read this entire section before starting to mount the device.
For mounting the clip-on frame, you can use- the supplied double-sided adhesive strips or- the supplied screws to fix it to a wall.
16
Mounting 5.1 Adhesive strip mounting For mounting the clip-on frame using the adhesive strips, please proceed as follows: – Choose a site for installation.
Make sure that the mounting surface is smooth, solid, non-disturbed, free of dust, grease and sol-vents and not too cold to ensure long-time ad-herence.
– Fix the adhesive strips (C) on the back side of the clip-on frame in the provided area (see fig. 2).- Remove the protective film from the adhesive strips.- Press the clip-on frame with the back side to the wall in the position where it should subsequently be attached.- Insert the desired Homemaitc IP device (e.g. a Homematic IP Wall Thermostat) into the clip-on frame (see fig. 3). Make sure that the spring latches (A) are completely latched.
Please refer to the operating manual of the inserted device for further information on integration into the Homematic IP system.
17
Mounting 5.2 Screw mounting For mounting the clip-on frame using screws, please proceed as follows: – Choose a site for installation.
Make sure that no electricity or similar lines run in the wall at this location!
– Position the clip-on frame on the desired site on the wall.- Use a pen to mark the positions of the two bore holes (B) according to the clip-on frame with a distance of 30 mm on the wall (see fig. 4).- Now drill the bore holes.
If you are working with a stone wall, drill the marked two 5 mm holes and insert the plugs supplied. If you are working with a wooden wall, you can pre-drill 1.5 mm holes to make screws easier to insert.
– Use the supplied screws and plugs to fasten the clip-on frame (see fig. 5).- Insert the desired Homemaitc IP device (e.g. a Homematic IP Wall Thermostat) into the clip-on frame (see fig. 3). Make sure that the spring latches (A) are completely latched.
18
Maintenance and cleaning Please refer to the operating manual of the in-serted device for further information on integra-tion into the Homematic IP system.
6 Maintenance and cleaning The product does not require you to carry out any maintenance. Enlist the help of an expert to carry out any maintenance or repairs.
Clean the product using a soft, lint-free cloth that is clean and dry. You may dampen the cloth a little with lukewarm water in order to remove more stubborn marks. Do not use any detergents containing solvents for cleaning purposes. They could corrode the plastic housing and label.
7 Technical specifications Device short name: HmIP-SF-2Degree of protection: IP20Degree of pollution: 2Ambient temperature: 0 to 50 °CDimensions (W x H x D): 60 x 60 x 12 mmWeight: 11 g Subject to technical changes.
19
Technical specifications Instructions for disposalDo not dispose of the device with regular domestic waste! Electronic equipment must be disposed of at local collection points for waste electronic equipment in compliance with the Waste Electrical and Electronic Equipment Directive.
Information about conformityThe CE sign is a free trading sign addressed ex-clusively to the authorities and does not include any warranty of any properties.
For technical support, please contact your retailer.
20
Technical specifications
Podmienky používania dokumentácie produktu
Súvisiace produkty
-

Detektor rozbitia skla X4-LIFE 701231, 95 dB
€8.07 Overiť cenu -

Diaľkové ovládanie Rademacher Rademacher DuoFern Standaard 9491-2 32480361, 1-kanálový
€65.25 Overiť cenu -
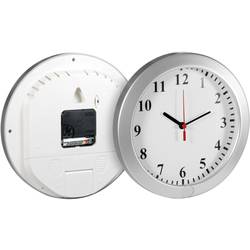
Bezpečnostná kamera v nástenných hodinách Technaxx 4218, 1280 x 720 pix, 32 GB
€76.83 Overiť cenu -
Pod omietku Rademacher Rademacher DuoFern RolloTron Standard DuoFern UW 1400 14234511
€165.64 Overiť cenu