€35.48
Priemerné hodnotenie:0/5(0x)
Vlastnosti a parametre výrobku
Skúsenosti užívateľov
Otázky a odpovede
Dokumentácia
Popis
Vlastnosti a parametre výrobku
| Séria (domáca technika) | Smartwares SmartHome Basic |
|---|---|
| spínací výkon (max.) | 1000 W |
| Napájanie | Na batérie |
| Prevádzkové napätie | 230 V |
| Frekvencia | 433 MHz |
| Max. dosah | 30 m |
| Spôsob montáže | Pod omietku |
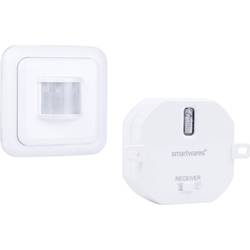
| Kategória výrobku | Detektor pohybu PIR |
Skúsenosti a názory zákazníkov
- Skúsenosti užívateľov nie sú k dispozícii.
Otázky užívateľov
- Užívatelia k tomuto výrobku zatiaľ nemali žiadne otázky.
Dokumentácia
Podmienky používania dokumentácie
Voorbereiding voor gebruik – Plaats de bewegingsdetector (SH5-TSO-A) minimaal 1,2 m boven de grond.
– Plaats de bewegingsdetector niet in direct zonlicht.
– Plaats de bewegingsdetector niet voor een raam, ventilator of airconditioning.
– Plaats de bewegingsdetector niet boven of naast een warmtebron.
Installatie bewegingsdetector (SH5-TSO-A) deel 1
a. Verwijder eerst de beschermingskap en dan het frame van de montageplaat 1.
b. Bevestig de montageplaat op de gewenste plaats op de muur met de meegeleverde pluggen en schroeven 2. Let op de pijl omhoog.
c. Activeer de batterijen door de lipjes uit de bewegingsdetector te trekken 3.
De bewegingsdetector met een ontvanger koppelen 4
a. Zet de schakelaar rechtsonder op de achterkant van de beschermingskap op DEL.
b. Druk 3 seconden op de knop op de ontvanger en laat deze vervolgens los. Bij deze handeling gaat de LED knipperen. Uw ontvanger bevindt zich nu in de koppelmodus.
Let op! De LED mag pas knipperen na het loslaten. Als de LED gaat knipperen tijdens indrukken dan wordt er niet gekoppeld.
c. Zet de schakelaar op SET. De LED op de ontvanger gaat branden, de bewegingsdetector is nu gekoppeld. Herhaal deze stappen voor eventuele overige ontvangers.
De bewegingsdetector instellen 5
a. Zet de schakelaar linksonder op de achterkant van de beschermingskap op 5 sec, 1 min, 5 min of 10
min om de tijd in te stellen die de ontvanger aanblijft nadat beweging is gedetecteerd.
b. Zet de schakelaar rechts op de achterkant van de beschermingskap op H (hoog), M (middel) of L
(laag) om het lichtniveau in te stellen waarbij u wilt dat de lamp aan gaat.
c. Zet de schakelaar links op de achterkant van de beschermingskap op 1M, 3M of 6M om de gevoeligheid van de bewegingsdetector in te stellen. 1M = weinig gevoelig. 3M = gevoelig.
6M = zeer gevoelig.
Installatie bewegingsdetector deel 2
– Plaats eerst het frame en dan de beschermingskap terug op de montageplaat 6. Let op de klikvingers.
EN
NLFR
IT
ab c 1
2
3
4
5
6
Preparation for use – Install the motion detector (SH5-TSO-A) at least 1.2 m above the floor.
– Do not install the motion detector in direct sunlight.
– Do not install the motion detector in front of a window, fan or air-conditioning.
– Do not install the motion detector over or next to a heat source.
Installing the motion detector (SH5-TSO-A) part 1
a. First remove the protective cover and the frame from the mounting plate 1.
b. Attach the mounting plate to the desired spot on the wall, using the supplied screws 2.
Note the up arrow.
c. Activate the batteries by pulling out the tabs of the motion detector 3.
Pairing the motion detector with a receiver 4
a. Slide the lower right switch on the back of the protective cover to the DEL position.
b. Press and hold the button on the receiver for 3 seconds and then release it. During this operation the LED starts to blink. Your receiver is now switched into the pairing mode.
Attention: the LED should blink only after releasing the button. If the LED starts to blink while holding the button, there will be no pairing.
c. Slide the switch to the SET position. The LED on the receiver will light up, the motion detector is now linked. Repeat these steps for any other receiver.
Setting the motion detector 5
a. Slide the lower left switch on the back of the protective cover on 5 sec, 1 min, 5 min or 10 min to set the time that the receiver remains switched on after movement is detected.
b. Slide the switch at the right side on the back of the protective cover on H (high), M (medium) or L
(low) to set the light level in which you want the lamp to switch on.
c. Slide the switch at the left side on the back of the protective cover on 1M, 3M or 6M to set the sensitivity of the motion detector. 1M = low sensitive. 3M = sensitive. 6M = very sensitive.
Installing the motion detector part 2
– First mount the frame on the mounting plate and then mount the protective cover 6. Note the snap connections.
DE
Benutzung vorbereiten – Montieren Sie den Bewegungsmelder (SH5-TSO-A) mindestens 1,2 m über dem Boden.
– Installieren Sie den Bewegungsmelder nicht in direktem Sonnenlichteinfall.
– Installieren Sie den Bewegungsmelder nicht vor einem Fenster, Ventilator oder vor einer Klimaanlage.
– Installieren Sie den Bewegungsmelder nicht über oder in der Nähe einer Wärmequelle.
Installation des Bewegungsmelders (SH5-TSO-A), Teil 1
a. Entfernen Sie zuerst die Schutzabdeckung und den Rahmen von der Montageplatte 1 .
b. Befestigen Sie die Montageplatte mit den mitgelieferten Dübeln und Schrauben an der gewünschten Stelle an der Wand 2.
Beachten Sie den nach oben gerichteten Pfeil.
c. Aktivieren Sie die Batterien, indem Sie die Streifen aus dem Bewegungsmelder herausziehen 3.
Verbindung des Bewegungsmelders mit einem Empfänger 4
a. Schieben Sie den rechten, unteren Schalter auf der Rückseite der Schutzabdeckung auf die Position DEL.
b. Drücken und halten Sie die Taste am Empfänger 3 Sekunden lang und lassen Sie sie wieder los. Während dieses Vorgangs beginnt die LED zu blinken. Ihr Empfänger wurde jetzt in den Verbindungsmodus geschaltet.
Achtung: Die LED darf erst nach der Freigabe blinken. Wenn die LED beginnt zu blinken, während die Taste noch gedrückt wird, wird keine Verbindung aufgebaut.
c. Schieben Sie den Schalter in die SET-Stellung. Die LED am Empfänger leuchtet auf und der Bewegungsmelder ist jetzt verbunden. Wiederholen Sie diese Schritte für alle anderen Empfänger.
Einrichten des Bewegungsmelders 5
a. Schieben Sie den linken, unteren Schalter auf der Rückseite der Schutzabdeckung auf 5 Sek., 1 Min., 5 Min. oder 10 Min., um die Zeit festzulegen, die der Empfänger eingeschaltet bleibt, nachdem eine Bewegung festgestellt wurde.
b. Schieben Sie den rechten Schalter auf der Rückseite der Schutzabdeckung auf die Position H (hoch), M
(mittel) oder L (niedrig), um den Helligkeitsgrad festzulegen, bei dem die Lampe eingeschaltet werden soll.
c. Um die Empfindlichkeit des Bewegungsmelders festzulegen, schieben Sie den linken Schalter auf der Rückseite der Schutzabdeckung auf 1M, 3M oder 6M. 1M = niedrige Empfindlichkeit. 3M = hohe Empfindlichkeit. 6M = sehr hohe Empfindlichkeit.
Installation des Bewegungsmelders, Teil 2
– Montieren Sie zuerst den Rahmen und dann die Schutzabdeckung auf der Montageplatte 6. Beachten Sie die Arretierungsschlaufen.Préparation à l’utilisation – Installez le détecteur de mouvement (SH5-TSO-A) à au moins 1,2 m du sol.
– N’installez pas le détecteur de mouvement sous les rayons directs du soleil.
– N’installez pas le détecteur de mouvement en face d’une fenêtre, d’un ventilateur ou d’un climatiseur.
– N’installez pas le détecteur de mouvement sur ou près d’une source de chaleur.
Partie 1 de l’installation du détecteur de mouvement (SH5-TSO-A) a. Tout d’abord, retirez le cache de protection et ensuite le cadre de la plaque de fixation 1.
b. Installez la plaque de fixation à l’endroit désiré sur le mur avec les vis et les chevilles fournies 2.
Notez la fièche vers le haut.
c. Actionnez les piles en tirant sur les onglets du détecteur de mouvement 3.
Réaliser la liaison entre le détecteur de mouvement et un récepteur 4
a. Glissez le commutateur du bas à droite sur l’arrière du cache de protection sur la position DEL
(Annulation).
b. Maintenez le bouton du récepteur enfoncé pendant 3 secondes avant de le relČcher. Pendant cette opération, la DEL commence à clignoter. Votre récepteur est à présent en mode de connexion.
Attention : la DEL doit clignoter uniquement une fois le bouton relČché. Si la DEL commence à clignoter lorsque le bouton est enfoncé, aucune connexion ne se produira.
c. Faites coulisser l’interrupteur sur la position SET. La DEL du récepteur s’allumera, le détecteur de mouvement est à présent connecté. Recommencez ces étapes pour tout autre récepteur.
Réglage du détecteur de mouvement 5
a. Glissez le commutateur du bas à gauche sur l’arrière du cache de protection sur 5 s, 1 min, 5 min ou 10 min pour régler la durée pendant laquelle le récepteur reste actif une fois un mouvement détecté.
b. Glissez le commutateur sur le côté droit à l’arrière du cache de protection sur H (high – élevé), M
(medium – moyen) ou L (low – faible) pour régler l’intensité lumineuse souhaitée de la lampe à allumer.
c. Glissez le commutateur sur le côté gauche à l’arrière du cache de protection sur 1 M, 3 M ou 6 M pour régler la sensibilité du détecteur de mouvement. 1 M = faible sensibilité. 3 M = bonne sensibilité. 6
M = forte sensibilité.
Partie 2 de l’installation du détecteur de mouvement – D’abord, montez le cadre et ensuite le cache de protection de la plaque de fixation 6. Notez les onglets de verrouillage.
Preparazione per l’uso – Installare il rilevatore di movimento (SH5-TSO-A) almeno 1,2 m sopra il pavimento.
– Non installare il rilevatore di movimento alla luce diretta del sole.
– Non installare il rilevatore di movimento davanti a una finestra, un ventilatore o un condizionatore d’aria.
– Non installare il rilevatore di movimento sopra o accanto a una fonte di calore.
Installazione del rilevatore di movimento (SH5-TSO-A) – Parte 1
a. Prima rimuovere il coperchio protettivo e il telaio dalla piastra di montaggio 1.
b. Collegare la piastra di montaggio nella posizione desiderata sulla parete con le viti in dotazione 2. Porre attenzione alla freccia su.
c. Attivare le batterie estraendo le linguette dal rilevatore di movimento 3.
Associazione del rilevatore di movimento al ricevitore 4
a. Portare l’interruttore inferiore destro sul retro del coperchio protettivo in posizione DEL.
b. Tenere premuto il pulsante sul ricevitore per 3 secondi e rilasciarlo. Durante questa operazione il LED
inizia a lampeggiare. Il ricevitore a questo punto è in modalità di associazione.
Attenzione: il LED deve lampeggiare solo dopo il rilascio del pulsante. Se il LED inizia a lampeggiare tenendo premuto il pulsante, l’associazione non sarà effettuata.
c. Portare l’interruttore in posizione SET. Il LED del ricevitore si accende, a questo punto il rilevatore di movimento è collegato. Ripetere queste operazioni per tutti gli altri ricevitori.
Impostazioni del rilevatore di movimento 5
a. Portare l’interruttore in basso a sinistra sul retro del coperchio di protezione su 5 sec, 1 min, 5 min o 10 min per impostare la durata di attivazione del ricevitore dopo il rilevamento del movimento.
b. Portare l’interruttore a destra del retro sul coperchio protettivo su H (high), M (medium) o L (low) per impostare il livello di luminosità a cui si desidera l’accensione della lampada.
c. Portare l’interruttore sulla sinistra del retro del coperchio di protezione su 1M, 3M o 6M per impostare la sensibilità del rilevatore di movimento. 1M = scarsamente sensibile. 3M = sensibile.
6M = molto sensibile.
Installazione del rilevatore di movimento – Parte 2
– Prima montare il telaio sulla piastra di montaggio, quindi montare il coperchio di protezione 6.
Notare i collegamenti a scatto.
Specifications: Maximum range: 30 m Time adjustment: 5 sec. – 10 min.
Sensitivity adjustment: 1M – 6M
Detection range: Up to 8 m. x 140° Battery: 2 x 1,5V, type AAA (incl.) 1 Channel Warranty: 2 years10.037.11 | SH5-TSO-A
433.92MHz.
EN Wireless motion detector NL Draadloze bewegingsdetector DE Funk-Bewegungsmelder FR Détecteur de mouvement sans fil ES Detector de movimiento inalámbrico IT Rilevatore di movimento wireless ES
Preparación para el uso – Instale el detector de movimiento (SH5-TSO-A) al menos a 1,2 m por encima del suelo.
– No permita que el detector de movimiento reciba la luz solar directamente.
– No instale el detector de movimiento delante de una ventana, un ventilador o una unidad de aire acondicionado.
– No instale el detector de movimiento por encima o cerca de una fuente de calor.
Instalación del detector de movimiento (SH5-TSO-A) primera parte a. En primer lugar, extraiga la cubierta protectora y a continuación el marco de la placa de montaje 1.
b. Coloque la placa de montaje en el lugar de la pared que desee y fíjela con los tacos y los tornillos proporcionados 2.
Observe la flecha hacia arriba.
c. Active las baterías tirando de las pestañas del detector de movimiento.
3.
Conexión del detector de movimiento a un receptor 4
a. Deslice el interruptor inferior derecho de la parte posterior de la cubierta protectora hasta la posición DEL.
b. Presione y mantenga el botón del receptor durante 3 segundos y suéltelo. Durante esta operación el LED comenzará a parpadear. El receptor pasará a modo conexión.
Atención: el LED solamente debe parpadear tras soltar el botón. Si el LED comienza a parpadear durante la pulsación no se producirá la conexión.
c. Deslice el interruptor a la posición SET. El LED del receptor se encenderá y el detector de movimiento estará conectado. Repita estos pasos para cualquier otro receptor.
Programación del detector de movimiento 5
a. Deslice el interruptor inferior izquierdo de la parte posterior de la cubierta protectora hasta la posición de 5 segundos, 1 minuto, 5 minutos o 10 minutos para programar el tiempo que el receptor permanecerá encendido tras detectar algún movimiento.
b. Deslice el interruptor situado en el lado derecho de la parte posterior de la cubierta protectora hasta H (alto), M (medio) o L (bajo) para seleccionar el nivel de intensidad con el que se encenderá la luz.
c. Deslice el interruptor situado en el lado izquierdo de la parte posterior de la cubierta protectora hasta 1M, 3M o 6M para seleccionar la sensibilidad del detector de movimiento. 1M = sensibilidad baja. 3M = sensible. 6M = muy sensible.
Instalación del detector de movimiento segunda parte – En primer lugar, monte el marco y después la cubierta protectora en la placa de montaje 6.
Observe las pestañas de fijación.
CS
SV
a b c 1
2
3
4
5
6
Förberedelser för användning – Installera rörelsedetektorn (SH5-TSO-A) minst 1,2 m över golvet.
– Installera inte rörelsedetektorn i direkt solljus.
– Installera inte rörelsedetektorn framför ett fönster, fläkt eller luftkonditionering.
– Installera inte rörelsedetektorn över eller bredvid en värmekälla.
Installation rörelsedetektor (SH5-TSO-A) del 1
a. För det första, ta bort skyddshöljet och sedan ramen från monteringsplattan 1.
b. Fäst monteringsplattan på önskad plats på väggen med de medföljande pluggarna och skruvarna 2.
Notera uppåtpilen.
c. Aktivera batterierna genom att dra ut flikarna i rörelsedetektorn 3.
Ansluta rörelsedetektorn till en mottagare 4
a. Skjut den nedre högra omkopplaren på baksidan av skyddshöljet till DEL-läget.
b. Håll in knappen på mottagaren i 3 sekunder och släpp den sedan. LED:n börjar blinka. Din mottagare är nu i länkningsläge.
Observera: LED:n ska endast blinka sedan du släppt knappen. Om LED:n börjar blinka medan knappen trycks in utförs ingen länkning.
c. Skjut omkopplaren till läge SET. LED:n på mottagaren tänds, och rörelsedetektorn är nu länkad.
Upprepa dessa steg för andra mottagare.
Inställning av rörelsedetektorn 5
a. Skjut den nedre vänstra omkopplaren på baksidan av skyddshöljet till 5 sekunder, 1 minut, 5 minuter eller 10 minuter för att ställa in tiden som mottagaren förblir påslagen efter att rörelse detekteras.
b. Skjut omkopplaren till höger på baksidan av skyddshöljet till H (hög), M (medium) eller L (låg) för att ställa in den önskade ljusnivån du vill att lampan tänds på.
c. Skjut omkopplaren till vänster på baksidan av skyddshöljet till 1M, 3M eller 6M för att ställa in känsligheten för rörelsedetektorn. 1M = låg känslighet. 3M = känslig. 6M = mycket känslig.
Installation rörelsedetektor (SH5-TSO-A) del 2
– Först, montera ramen och sedan skyddshöljet på monteringsplattan 6 . Notera de låsande flikarna.
Příprava pro použití – Namontujte detektor pohybu (SH5-TSO-A) minimálně 1,2 m nad podlahu.
– Nemontujte detektor pohybu na přímé sluneční světlo.
– Nemontujte detektor pohybu před okno, ventilátor anebo klimatizaci.
– Nemontujte detektor pohybu nad nebo vedle zdrojů tepla.
Montáž detektoru pohybu (SH5-TSO-A) část 1
a. Nejprve odstraňte ochranný kryt a pak rám z montážní desky 1.
b. Upevněte montážní desku na požadované místo na zdi pomocí dodaných hmoždinek a šroubků.2
Řiďte se šipkou nahoru.
c. Aktivujte baterie vyjmutím záložek z detektoru pohybu.
3
Spojení detektoru pohybu s přijímačem 4
a. Přepněte pravý spodní spínač na zadní části ochranného krytu do polohy DEL.
b. Na 3 sekundy stiskněte a přidržte tlačítko na přijímači a pak jej uvolněte. Během této činnosti začne blikat LED. Váš přijímač je nyní přepnut do režimu spárování.
Upozornění: LED by měla blikat pouze po uvolnění. Pokud LED začne blikat během doby kdy tisknete tlačítko, přijímač se nespáruje.
c. Posuňte spínač do polohy SET (Nastavit). LED na přijímači se rozsvítí, detektor pohybu je nyní propojen. Opakujte tyto kroky pro všechny další přijímače.
Nastavení detektoru pohybu 5
a. Přepněte levý spodní spínač na zadní straně ochranného krytu na 5 s, 1 min, 5 min nebo 10 min pro nastavení času, během které přijímač zůstává zapnutý po detekci pohybu.
b. Přepněte pravý spínač na zadní straně ochranného krytu na H (vysoká), M (střední) nebo L (nízká) pro nastavení intenzity světla, se kterou chcete světlo zapnout.
c. Přepněte levý spínač na zadní straně ochranného krytu na 1M, 3M nebo 6M pro nastavení citlivosti detektoru pohybu. 1M = nízká citlivost. 3M = citlivý. 6M = vysoká citlivost.
Montáž detektoru pohybu, část 2
– Nejprve namontujte rám a pak ochranný kryt na montážní desku.
6 Dejte pozor na západkové jazýčky.
PL
Przygotowanie do użycia – Zainstaluj czujnik ruchu (SH5-TSO-A) przynajmniej 1,2 m nad podłogą.
– Nie instaluj czujnika ruchu w miejscu nasłonecznionym.
– Nie instaluj czujnika ruchu przed oknem, wentylatorem lub klimatyzacją.
– Nie instaluj czujnika ruchu nad lub obok źródła ciepła.
Instalacja czujnika ruchu (SH5-TSO-A) część 1
a. Najpierw zdejmij pokrywę ochronną, a następnie ramkę z płytki montażowej 1.
b. Za pomocą dołączonych kołków z wkrętami umocuj płytkę montażową w wybranym miejscu na ścianie 2.
Zwróć uwagę na strzałkę w górę.
c. Uaktywnij baterie poprzez wyciągnięcie pasków zabezpieczających na czujniku ruchu 3. Łączenie czujnika ruchu z odbiornikiem 4
a. Przesuń przełącznik w prawym dolnym rogu z tyłu pokrywy ochronnej na pozycję DEL.
b. Naciśnij i przytrzymaj przycisk na odbiorniku przez 3 sekundy, a następnie zwolnij go. W trakcie tej operacji kontrolka LED zaczyna migać. Odbiornik jest teraz przełączony na tryb łączenia.
Uwaga: Kontrolka LED powinna migać tylko po zwolnieniu. Jeśli kontrolka LED zacznie migać już w trakcie naciskania przycisku, wtedy nie będzie połączenia.
c. Przesuń przełącznik do pozycji SET. Kontrolka LED na odbiorniku zaświeci się, detektor ruchu jest teraz połączony. Powtórz te kroki dla każdego innego odbiornika.
Ustawianie czujnika ruchu 5
a. Przesuń przełącznik w lewym dolnym rogu z tyłu pokrywy ochronnej na 5 sek, 1 min, 5 min lub 10
min, aby ustawić czas, na jak długo po wykryciu ruchu odbiornik ma pozostać włączony.
b. Przesuń przełącznik po prawej stronie z tyłu pokrywy ochronnej na H (wysoki), M (średni) lub L
(niski), aby ustawić natężenie światła, z jakim ma się włączyć lampa.
c. Przesuń przełącznik po lewej stronie z tyłu pokrywy ochronnej na 1M, 3M lub 6M, aby ustawić czułość czujnika ruchu. 1M = mało czuły. 3M = czuły. 6M = bardzo czuły.
Instalacja czujnika ruchu część 2
– Najpierw zamontuj ramkę, a następnie pokrywę ochronną na płytce montażowej 6. Zwróć uwagę na zatrzaski.EN
Go to www.smartwares.eu to obtain manuals, product information, images and the document of conformity NL Ga naar www.smartwares.eu voor handleidingen, product informatie, afbeeldingen of het document van conformiteit DE Gehen Sie auf www.smartwares.eu, um Handbücher, Produktinformationen, Bilder und die Konformitätserklärung abzurufen FR Visitez www.smartwares.eu pour obtenir les modes d’emploi, les informations concernant les produits, les images et la documentation de conformité du produit ES Acceda a www.smartwares.eu para obtener manuales, información de productos, imágenes y la documentación de cumplimiento IT Visitare il sito www.smartwares.eu per scaricare i manuali, ottenere informazioni, immagini e documento di conformità dei prodotti.
PT Aceda a www.smartwares.eu para obter manuais, informações dos produtos, imagens e o documento de conformidade.
TR Kflavuzlara, ürün bilgisine, resimlere ve uygunluk belgesine ulaşmak için www.smartwares.eu adresini ziyaret edin.
PL Wejdź na stronę www.smartwares.eu, aby uzyskać instrukcje, informacje o produktach, zdjęcia oraz dokument zgodności.
SV Gå till www.smartwares.eu för att hitta handböcker, produktinformation, bilder och deklarationen om överensstämmelse CS Pro získání návodů, informací o výrobku, obrázků a dokumentů o schodě navštivte stránky www.smartwares.eu SK Návody, informácie o výrobkoch, obrázky a dokumenty o zhode nájdete na stránke www.smartwares.eu.
10.037.11 | SH5-TSO-APT Detetor de movimentos TR Kablosuz hareket sensörü PL Bezprzewodowy detektor ruchu SV Trådlös rörelsedetektor CS Bezdrátový detektor pohybu SK Bezdrôtový detektor pohybu PT
Preparaçčo para utilizaçčo – Instale o detetor de movimento (SH5-TSO-A), pelo menos, a 1,2 m do chčo.
– Nčo instale o detetor de movimento sob luz solar direta.
– Nčo instale o detetor de movimento à frente de uma janela, ventoinha ou unidade de ar condicionado.
– Nčo instale o detetor de movimento sobre ou adjacente a uma fonte de calor.
Instalar o detetor de movimento (SH5-TSO-A) – Parte 1
a. Primeiro retire a cobertura de proteçčo e a estrutura da placa de montagem 1.
b. Fixe a placa de montagem no local pretendido na parede, utilizando os parafusos fornecidos 2.
Observe a seta para cima.
c. Ative as pilhas, retirando as patilhas do detetor de movimento 3.
Emparelhar o detetor de movimento com um recetor 4
a. Faça desligar o interruptor inferior direito na parte de trás da cobertura de proteçčo para a posiçčo DEL.
b. Prima e mantenha o botčo premido no recetor durante 3 segundos e depois solte-o. Durante esta operaçčo, o LED começa a piscar. O seu recetor está agora ligado no modo de emparelhamento.
Atençčo: o LED só deverá piscar depois de soltar o botčo. Se o LED começar a piscar enquanto mantiver o botčo premido, nčo se verificará o emparelhamento.
c. Faça deslizar o interruptor para a posiçčo SET. O LED no recetor irá acender-se, o detetor de movimento está agora ligado. Repita estes passos para qualquer outro recetor.
Configurar o detetor de movimento 5
a. Faça deslizar o interruptor inferior esquerdo na parte de trás da cobertura de proteçčo para 5 sec, 1 min, 5 min ou 10 min para definir o tempo que o recetor permanece ligado depois de ter sido detetado movimento.
b. Faça deslizar o interruptor superior direito na parte de trás da cobertura de proteçčo para H (alto), M
(médio) ou L (baixo) para definir o nível de luz com o qual pretende que a lČmpada se acenda.
c. Faça deslizar o interruptor superior esquerdo na parte de trás da cobertura de proteçčo para 1M, 3M
ou 6M para definir a sensibilidade do detetor de movimento. 1M = reduzida sensibilidade. 3M = sensível. 6M = extremamente sensível.
Instalar o detetor de movimento – Parte 2
– Primeiro monte a estrutura na placa de montagem e depois a cobertura de proteçčo 6. Observe as ligações de encaixe.
TR
Kullanım için hazırlık – Hareket detektörünü (SH5-TSO-A) yerden en az 1,2 m yukarf takfn.
– Hareket detektörünü doğrudan güneş fşfğf gelen yere takmayfn.
– Hareket detektörü pencere, fan veya klima önüne takmayfn.
– Hareket detektörünü herhangi bir fsf kaynağfnfn üzerine veya yakfnfna takmayfn.
Hareket detektörünü (SH5-TSO-A) takma – Bölüm 1
a. İlk olarak koruyucu kapağf ve gövdeyi montaj plakasfndan çfkarfn 1.
b. Montaj plakasfnf ürünle birlikte gelen vidalarf kullanarak duvardaki istenen noktaya takfn 2.
Yukarf oka dikkat edin.
c. Hareket detektörünün şeritlerini çekerek pilleri etkinleştirin 3.
Hareket detektörünü alıcı ile eşleştirme 4
a. Koruyucu kapağfn arkasfnda, sağ altta bulunan anahtarf DEL konumuna kaydfrfn.
b. Alfcfdaki düğmeyi 3 saniye boyunca basflf tutun ve ardfndan serbest bfrakfn. Bu işlem esnasfnda LED
yanfp sönmeye başlar. Alfcfnfz eşleştirme moduna geçer.
Dikkat:LED düğme serbest bfrakfldfktan hemen sonra yanfp sönmelidir. LED düğme basflf tutulurken yanfp sönmeye başlarsa eşleştirme gerçekleşmeyecektir.
c. Anahtarf SET konumuna kaydfrfn. Alfcfdaki LED yanacaktfr, hareket detektörü artfk bağlfdfr. Bu adfmlarf diğer alfcflar için tekrarlayfn.
Hareket detektörünü ayarlama 5
a. Alfcfnfn hareket algflandfktan sonra açfk kalacağf süreyi ayarlamak için koruyucu kapağfn arkasfnda, sol altta bulunan anahtarf 5 s (5 saniye), 1 m (1 dakika), 5 m (5 dakika) veya 10 m (10 dakika) seçeneğine kaydfrfn.
b. Lambanfn açflmasfnf istediğiniz fşfk seviyesini ayarlamak için koruyucu kapağfn arkasfnda, sağ tarafta bulunan anahtarf H (yüksek), M (orta) veya L (düşük) seçeneğine kaydfrfn.
c. Hareket detektörünün duyarlflfğfnf ayarlamak için koruyucu kapağfn arkasfnda, sol tarafta bulunan anahtarf 1M, 3M veya 6M seçeneğine kaydfrfn. 1M = düşük duyarlf. 3M = duyarlf. 6M = yüksek duyarlf.
Hareket detektörünü takma – Bölüm 2
– İlk olarak gövdeyi montaj plakasfna monte edin, ardfndan koruyucu kapağf monte edin 6.
Oturan bağlantflara dikkat edin.
SK
Príprava na použitie – Nainštalujte detektor pohybu (SH5-TSO-A) minimálne 1,2 m nad podlahu.
– Neinštalujte detektor pohybu na priame slnečné svetlo.
– Neinštalujte detektor pohybu pred okno, ventilátor alebo klimatizáciu.
– Neinštalujte detektor pohybu nad alebo vedúa zdrojov tepla.
Inštalácia detektora pohybu (SH5-TSO-A) – Časť 1
a. Najprv odstráňte ochranný kryt a potom rámček montážnej dosky 1.
b. Pomocou dodaných skrutiek upevnite montážnu dosku na požadované miesto na stene2.
Všímajte si šípku nahor.
c. Aktivujte batérie vytiahnutím pások z detektora pohybu 3.
Spárovanie detektora pohybu s prijímačom 4
a. Prepnite pravý spodný spínač na zadnej časti ochranného krytu do polohy DEL.
b. Na 3 sekundy stlačte a podržte tlačidlo na prijímači a potom ho uvoúnite. Počas tejto činnosti začne blikať LED. Váš prijímač je teraz prepnutý do režimu spárovania.
Pozor: LED by mala blikať len po uvoúnení tlačidla. Ak LED začne blikať počas stlačenia tlačidla, prijímač sa nespáruje.
c. Spínač prepnite do polohy SET. LED na prijímači sa rozsvieti, detektor pohybu je teraz pripojený.
Opakujte tieto kroky pre všetky ďalšie prijímače.
Nastavenie detektora pohybu 5
a. Prepnite úavý spodný spínač na zadnej časti ochranného krytu na 5 sek., 1 min., 5 min. alebo 10
min., aby ste nastavili čas, počas ktorého prijímač zostane zapnutý po detekcii pohybu.
b. Prepnite pravý spínač na zadnej strane ochranného krytu na H (vysoká), M (stredná) alebo L (nízka), aby ste nastavili intenzitu, ktorú chcete mať pri zapnutí svetla.
c. Prepnite úavý spínač na zadnej strane ochranného krytu na 1M, 3M alebo 6M, aby ste nastavili citlivosť detektora pohybu. 1M = nízka citlivosť. 3M = stredná citlivosť. 6M = vysoká citlivosť.
Inštalácia detektora pohybu – Časť 2
– Najprv namontujte rám na montážnu dosku a potom namontujte ochranný kryt 6. Dajte pozor na západkové jazýčky.

