
€127.03
Priemerné hodnotenie:0/5(0x)
Vlastnosti a parametre výrobku
Skúsenosti užívateľov
Otázky a odpovede
Dokumentácia
Popis
Vlastnosti a parametre výrobku
| Typ fotoaparátu | Kopulová kamera |
|---|---|
| Veľkosť senzoru | 8.5 mm (1/3″) |
| Druh senzora (zabezpečenie) | CMOS |
| Ohnisková vzdialenosť | 2,8 mm |
| Horizontálny zorný uhol | 90 ° |
| Ovládanie pomocou aplikácie pre smartphone | Áno |
| prenos | LAN Wi-Fi |
| Wi-Fi štandard | IEEE802.11b IEEE802.11g IEEE802.11n |
| max.dosah IR svetla | 30 m |
| Miesto použitia | Vonkajšia |
| Typ pamäťovej karty | MicroSD karta (do 128 GB) |
| Vonkajšia šírka | 110 mm |
| Vonkajšia výška | 110 mm |
| Rozmer, hĺbka | 81 mm |
| Hmotnosť | 470 g |
| Rozlíšenie (max.) | 2048 x 1536 px |
| Standard přenosu signálu | IP |
| Spôsob ochrany | IP66 #####IK10 |
| Kategória výrobku | Bezpečnostná kamera |
Skúsenosti a názory zákazníkov
- Skúsenosti užívateľov nie sú k dispozícii.
Otázky užívateľov
- Užívatelia k tomuto výrobku zatiaľ nemali žiadne otázky.
Dokumentácia
Podmienky používania dokumentácie
www.burg.biz BURGcam DOME 303
WIFI IR-Kuppelkamera WIFI IR dome camera Fernzugriff über BURG CAM Apps * * Android und Apple Smartphones und Tablets Kurzanleitung Quick installation guide
2 BURGcam DOME 303BURGcam DOME 303 3
BURGcam DOME 303
MotionDetectionWDRIR + ICREasy Installation2048 x 15362K-HD
Recording Micro SD
Language Deutsch 4
English 25
Download: www.burg.biz Download: www.burg.biz Download: www.burg.biz Descarga: www.burg.biz Download: www.burg.biz Download: www.burg.biz Download: www.burg.biz Download: www.burg.biz Ladattava tiedosto: www.burg.biz λήψη: www.burg.biz İndir: www.burg.biz Descărcare: www.burg.biz Pobieranie pliku: www.burg.biz Stáhnout: www.burg.biz Letölthető: www.burg.biz Download: www.burg.biz Download: www.burg.biz Download: www.burg.biz загрузка: www.burg.biz Download (зареди): www.burg.biz Download: www.burg.biz
4 | Deutsch BURGcam DOME 303BURGcam DOME 303 Deutsch | 5
Lieferumfang 1 x Kamera 1 x CD (Config Tool, Video Player) 1 x 12V DC Netzteil 1 x Bohrlochschablone 1 x Sechskantschlüssel 1 x Antenne 1 x Kurzanleitung Schrauben und Dübel Besondere Ausstattungsmerkmale – Bis zu 3 Megapixel Auflösung- Fernzugriff über BURG CAM Apps (Android und Apple Smartphones und Tablets) – Lokaler Zugriff über den Web Browser des PCs / Laptops- WLAN bis 50m im Freifeld- IR Reichweite bis 30m- Vandalismusgeschützt nach IK10- Für den Betrieb im Außenbereich geeignet (IP66)- Professionelle Gegenlichtkompensation- H.264 / H.264B / H.264H / MJPEG Video Komprimierung- Optimale professionelle Lösung für den Heimbereich- Einfach einzurichten dank WPS- WLAN oder LAN Betrieb möglich- Aufzeichnung auf lokaler Micro-SD Karte (max. 64 GB) (nicht im Lieferumfang enthalten) Abmessungen SeitenansichtUnterseite Alle Angaben in mm.
Zeichnung nicht maßstabsgerecht.
Irrtum und technische Änderungen vorbehalten.
Ø 110 mm 81 mm Ø 110 mm
6 | Deutsch BURGcam DOME 303BURGcam DOME 303 Deutsch | 7
Anschlusskabel 12 V DC Betriebsspannung Netzwerk Beschreibung WiFi Antenne Dichtungsring (wasserdicht) Reset: Halten Sie die Taste für ca. 8 Sekunden gedrückt, bis die Leuchtanzeige erlischt, um die Kamera auf Werkseinstellungen zurück zu setzen.
WPS: Drücken Sie einmal kurz auf die Taste, damit sich die Kamera mit dem WLAN-Router verbindet.
Micro SD-Kartenslot Status Leuchtanzeige: Rot: Booten Grün langsam blinkend: Booten abgeschlossen; Warten auf WiFi Verbindung Grün schnell blinkend: WiFi Verbindung wird hergestellt Grün: WiFi Verbindung erfolgreich hergestellt; Normalbetrieb Abwechselnd rot und grün: Kamera Update läuft Rot langsam blinkend: Netzwerkverbindung fehlgeschlagen oder unterbrochen Rot schnell blinkend: Fehlfunktion, Booten fehlgeschlagen, Alarm oder SD-Kartenfehler
8 | Deutsch BURGcam DOME 303BURGcam DOME 303 Deutsch | 9
Wand- / Deckenmontage – Schrauben Sie mit dem beiliegenden Sechskantschlüssel das Kuppelgehäuse vom Kamerakörper ab.
– Verwenden Sie die beiliegenden Schrauben, Dübel und Bohrlochschablone und schrauben Sie den Kamerakörper am gewünschten Ort fest. Stellen Sie sicher, dass der Untergrund mindestens das Dreifache des Gewichts der Kamera tragen kann.
– Lösen Sie die kleine Feststellschraube am Objektiv und richten Sie das Objektiv in die gewünschte Position aus. Ziehen Sie anschließend die Feststellschraube wieder fest.
– Schrauben Sie das Kuppelgehäuse wieder auf den Kamerakörper auf.
Decke oder Wand Dübel Kamerakörper Schrauben Kuppelgehäuse
10 | Deutsch BURGcam DOME 303BURGcam DOME 303 Deutsch | 11
Installation Vorbereitungen – Installieren Sie die Kamera am gewünschten Ort. Stellen Sie sicher, dass der Untergrund mindestens das Dreifache des Gewichts der Kamera inkl. Halterung tragen kann.
– Verwenden Sie die beiliegenden Schrauben / Dübel sowie die Bohrlochschablone.Verwenden Sie das beiliegende Netzteil, um die Kamera an die Betriebsspannung anzuschließen.
– Schrauben Sie die Antenne an der Kamera fest.
Für die Einrichtung der Kamera gibt es 3 unterschiedliche Möglichkeiten: Option 1 LAN Betrieb – Einrichtung mit PC / Laptop: – Verwenden Sie ein LAN/Netzwerkkabel (nicht im Lieferumfang enthalten) und verbinden Sie die Kamera und Ihren PC / Laptop mit dem Netzwerk. Ihr PC/ Laptop muss sich im gleichen Netzwerk befinden wie die Kamera.
– Legen Sie die beiliegende CD in Ihren PC / Laptop ein und starten Sie das Config Tool.
Weiter unter „Kamera-Auswahl über das Config Tool“Option 2
WLAN / LAN Installation – Einrichtung mit dem Smartphone: – Installieren Sie die BURG CAM App auf Ihrem Smartphone.
– Verbinden Sie Ihr Smartphone mit dem Netzwerk über WLAN.
– Starten Sie die BURG CAM App auf Ihrem Smartphone und wählen Sie im Hauptmenü: BURG CAM MOVE
Inbetriebnahme:Getting started: For camera installation, the following 3
options are available: Option 1: LAN operation: Installation via PC/laptop: Use a LAN/network cable (not included in the delivery) to connect the camera and your PC/laptop with the network. Your PC/laptop has to be in the same network as the camera.
Insert the supplied CD into your PC/ laptop drive and start the Config Tool.
Option 2: WLAN/LAN operation: Installation via smartphone: Use a LAN/network cable (not included in the delivery) to connect the camera and your PC/laptop with the network.
Connect your smartphone to the same network via WLAN.
Download the BURG CAM App to your smartphone.
Start the BURG CAM App on your smartphone and go to the main menu: ! ! Device manager
! ! Add device
! ! WIFI configuration Assign any name to the camera.
Scan the QR code of the camera or type in the camera’s serial number manually (you will find these information on the label on the camera or on the label on the packaging box).
Für die Einrichtung der Kamera gibt es 3
unterschiedliche Möglichkeiten: Option 1: LAN Betrieb: Einrichtung mit PC/Laptop: Verwenden Sie ein LAN/Netzwerkkabel (nicht im Lieferumfang enthalten) und verbinden Sie die Kamera und Ihren PC/ Laptop mit dem Netzwerk. Ihr PC/Laptop muss sich im gleichen Netzwerk befinden wie die Kamera.
Legen Sie die beiliegende CD in Ihren PC/Laptop ein und starten Sie das Config Tool.
Option 2:
WLAN/LAN Installation: Einrichtung mit dem Smartphone: Verwenden Sie ein LAN/Netzwerkkabel (nicht im Lieferumfang enthalten) und verbinden Sie die Kamera mit dem Netzwerk.
Verbinden Sie Ihr Smartphone mit demselben Netzwerk über WLAN.
Installieren Sie die BURG CAM App auf Ihrem Smartphone.
Starten Sie die BURG CAM App auf Ihrem Smartphone und wählen Sie im Hauptmenü:
! ! Gerätemanager
! ! Gerät hinzufügen
! ! WIFI Konfiguration Vergeben Sie einen beliebigen Namen für die Kamera.
Scannen Sie den QR-Code der Kamera oder tippen Sie die Seriennummer der Kamera manuell ein (Etikett auf Verpackung/Kamera).
!5
Gerätemanager BURG CAM MOVE
Inbetriebnahme:Getting started: For camera installation, the following 3
options are available: Option 1: LAN operation: Installation via PC/laptop: Use a LAN/network cable (not included in the delivery) to connect the camera and your PC/laptop with the network. Your PC/laptop has to be in the same network as the camera.
Insert the supplied CD into your PC/ laptop drive and start the Config Tool.
Option 2: WLAN/LAN operation: Installation via smartphone: Use a LAN/network cable (not included in the delivery) to connect the camera and your PC/laptop with the network.
Connect your smartphone to the same network via WLAN.
Download the BURG CAM App to your smartphone.
Start the BURG CAM App on your smartphone and go to the main menu: ! ! Device manager
! ! Add device
! ! WIFI configuration Assign any name to the camera.
Scan the QR code of the camera or type in the camera’s serial number manually (you will find these information on the label on the camera or on the label on the packaging box).
Für die Einrichtung der Kamera gibt es 3
unterschiedliche Möglichkeiten: Option 1: LAN Betrieb: Einrichtung mit PC/Laptop: Verwenden Sie ein LAN/Netzwerkkabel (nicht im Lieferumfang enthalten) und verbinden Sie die Kamera und Ihren PC/ Laptop mit dem Netzwerk. Ihr PC/Laptop muss sich im gleichen Netzwerk befinden wie die Kamera.
Legen Sie die beiliegende CD in Ihren PC/Laptop ein und starten Sie das Config Tool.
Option 2:
WLAN/LAN Installation: Einrichtung mit dem Smartphone: Verwenden Sie ein LAN/Netzwerkkabel (nicht im Lieferumfang enthalten) und verbinden Sie die Kamera mit dem Netzwerk.
Verbinden Sie Ihr Smartphone mit demselben Netzwerk über WLAN.
Installieren Sie die BURG CAM App auf Ihrem Smartphone.
Starten Sie die BURG CAM App auf Ihrem Smartphone und wählen Sie im Hauptmenü:
! ! Gerätemanager
! ! Gerät hinzufügen
! ! WIFI Konfiguration Vergeben Sie einen beliebigen Namen für die Kamera.
Scannen Sie den QR-Code der Kamera oder tippen Sie die Seriennummer der Kamera manuell ein (Etikett auf Verpackung/Kamera).
!5
Gerät hinzufügen BURG CAM MOVE
Inbetriebnahme:Getting started: For camera installation, the following 3
options are available: Option 1: LAN operation: Installation via PC/laptop: Use a LAN/network cable (not included in the delivery) to connect the camera and your PC/laptop with the network. Your PC/laptop has to be in the same network as the camera.
Insert the supplied CD into your PC/ laptop drive and start the Config Tool.
Option 2: WLAN/LAN operation: Installation via smartphone: Use a LAN/network cable (not included in the delivery) to connect the camera and your PC/laptop with the network.
Connect your smartphone to the same network via WLAN.
Download the BURG CAM App to your smartphone.
Start the BURG CAM App on your smartphone and go to the main menu: ! ! Device manager
! ! Add device
! ! WIFI configuration Assign any name to the camera.
Scan the QR code of the camera or type in the camera’s serial number manually (you will find these information on the label on the camera or on the label on the packaging box).
Für die Einrichtung der Kamera gibt es 3
unterschiedliche Möglichkeiten: Option 1: LAN Betrieb: Einrichtung mit PC/Laptop: Verwenden Sie ein LAN/Netzwerkkabel (nicht im Lieferumfang enthalten) und verbinden Sie die Kamera und Ihren PC/ Laptop mit dem Netzwerk. Ihr PC/Laptop muss sich im gleichen Netzwerk befinden wie die Kamera.
Legen Sie die beiliegende CD in Ihren PC/Laptop ein und starten Sie das Config Tool.
Option 2:
WLAN/LAN Installation: Einrichtung mit dem Smartphone: Verwenden Sie ein LAN/Netzwerkkabel (nicht im Lieferumfang enthalten) und verbinden Sie die Kamera mit dem Netzwerk.
Verbinden Sie Ihr Smartphone mit demselben Netzwerk über WLAN.
Installieren Sie die BURG CAM App auf Ihrem Smartphone.
Starten Sie die BURG CAM App auf Ihrem Smartphone und wählen Sie im Hauptmenü:
! ! Gerätemanager
! ! Gerät hinzufügen
! ! WIFI Konfiguration Vergeben Sie einen beliebigen Namen für die Kamera.
Scannen Sie den QR-Code der Kamera oder tippen Sie die Seriennummer der Kamera manuell ein (Etikett auf Verpackung/Kamera).
!5
WIFI Konfiguration – Vergeben Sie einen beliebigen Namen für die Kamera – Scannen Sie den QR-Code der Kamera oder tippen Sie die Seriennummer der Kamera manuell ein (Etikett auf Verpackung / Kamera).
– Verwenden Sie bei Erstinstallationen den Standard Login-Daten: Benutzername: admin Passwort: 9999
– Tippen Sie dann auf „Weiter“ und geben Sie nun das WLAN Passwort Ihres Netzwerkes ein.
– Tippen Sie dann auf „Weiter“ und warten Sie auf die Bestätigung der erfolgreichen Verbindung der Kamera mit dem WLAN Knoten.
12 | Deutsch BURGcam DOME 303BURGcam DOME 303 Deutsch | 13
Option 3 WLAN / WPS Installation: – Je nachdem, welches WLAN Router Modell Sie verwenden (z. B. Fritzbox), aktivieren Sie die WPS / WLAN Funktion, entweder durch Drücken der WPS / WLAN Taste an Ihrem Router oder durch entsprechende WLAN Einstellungen am Router.
Hierbei ist wichtig, dass die verschiedenen Geräte untereinander kommunizieren dürfen (Gastzugang deaktivieren).
– Drücken Sie die Reset/WPS Taste an der Kamera für max. 2 Sekunden, damit sich die Kamera mit dem WLAN-Router verbindet.
Hinweis: Drücken Sie die Taste nur kurz. Wenn Sie die Taste länger gedrückt halten (ca. 8 Sekunden), wird ein Reset durchgeführt.
– Der Router (Fritzbox) weist der Kamera eine IP-Adresse zu.
– Legen Sie die beiliegende CD in Ihren PC / Laptop ein und starten Sie das Config Tool.
Kamera-Auswahl über das Config Tool – Das Config Tool identifiziert alle im gleichen Netzwerk befindlichen Geräte und listet sie auf.
– Wählen Sie das gewünschte Gerät aus und klicken Sie auf das Browser Icon (rechts).
– Das Login-Fenster erscheint.
Login Im Login-Fenster geben Sie folgende Standard-Daten ein: Benutzername: admin Passwort: 9999
Es wird dringend empfohlen, nach Starten der Kamera den Benutzernamen und das Passwort zu ändern unter: Einstellungen System Konto
14 | Deutsch BURGcam DOME 303BURGcam DOME 303 Deutsch | 15
Beschreibung des Kamera-Menüs Wenn Sie sich eingeloggt haben, sehen Sie das Live-Bild der Kamera sowie die Menüpunkte.
1. LIVE
(Stream, Bild anpassung, Bildformat) 2. WIEDER GABE
3. EIN STEL LUNGEN
(Kamera, Netzwerk, Ereignis, Speicherung, System, Information) 4. LOGOUT
Detaillierte Erklärungen zu den einzelnen Menüpunkten finden Sie im Benutzerhandbuch.
Technische Daten KameratypWLAN IR-Kuppelkamera für den Innenund Außenbereich Sensor1/3” 3 MP Progressive Scan CMOS
Auflösung3 MP: 2048 x 1536 / 2304 x 1296
1080p: 1920 x 1080 (= Full HD) 720p: 1280 x 720
D1: 704 x 576 / 704 x 480
CIF: 352 x 288 / 352 x 240
Bildrate20 fps @ 3MP, 25/30fps @ 1080p Datenrate4 Kbps – 8192 Kbps IR ScheinwerferBis zu 30m Reichweite* IR SperrfilterMechanisch Objektiv2.8 mm F2.0 Festobjektiv BlickwinkelHorizontal: 90° WeißabgleichAutomatisch WLANIEEE802.11b/g/n LAN (RJ-45)10/100Base-T
Unterstützte ProtokolleIPv4/IPv6, HTTP, HTTPS, TCP/IP, UDP, UPnP, ICMP, IGMP, RTSP, RTP, SMTP, NTP, DHCP, DNS, PPPOE, DDNS, FTP, IP Filter, QoS
Micro-SD Kartemax. 128 GB; für Aufzeichnungen und Schnappschüsse InstallationWand- oder Deckenmontage Spannungsversorgung12V DC
Leistungsaufnahme< 4.5 W
Temperaturbereich-30°C bis +60°C
SchutzklasseIP66, IK10
16 | Deutsch BURGcam DOME 303BURGcam DOME 303 Deutsch | 17
Abmessungen Ø 110 x 81 mm Gewicht0.47 kg Zusatzfunktionen: GegenlichtkompensationenBLC / HLC / DWDR
Rauschreduzierung3D
Privatzonen4
* Hinweis: Die Reichweite des IR-Strahlers ist stark abhängig von Einsatzort und von der Umgebung. Stark absorbierende Flächen, wie z. B. dunkle raue Strukturen (Boden, Rasen, Asphalt) können zu einer deutlichen Verringerung der maximalen Reichweite führen.
Irrtum und technische Änderungen vorbehalten.
Ausführliches Benutzerhandbuch Diese Kurzanleitung dient dazu, das Gerät einfach und unkompliziert in Betrieb zu nehmen. Weitere ausführlichere Erklärungen und Beschreibungen der einzelnen Funktionen finden Sie im Benutzerhandbuch, das Sie als pdf-Datei herunterladen können: www.burg.biz Service & Downloads Bedienungsanleitungen Montageanleitungen Video-Sicherheit Alternativ können Sie für einen schnellen Zugriff auf das Handbuch diesen QR-Code einlesen, um das Handbuch direkt auf Ihr Smartphone oder Tablet zu erhalten. Unter diesem QR-Code finden Sie auch weitere Informationen (FAQ).
QR-Code für Bedienungsanleitung / weitere Informationen in Deutsch:
18 | Deutsch BURGcam DOME 303BURGcam DOME 303 Deutsch | 19
„Burg Cam“ App für P2P Anwendungen Sie können das Gerät auch über die „Burg Cam“ App von Ihrem Smartphone / Tablet aufrufen und steuern. Es stehen folgende Apps für Smartphones und für Tablets zur Verfügung, jeweils als kostenlose Version oder als kosten pflichtige „Pro“ Version: App NameBurg CamBurg Cam Pro Apps + E-MAPBurg Cam HD
Burg Cam HD Pro GerätSmartphoneSmartphoneTabletTablet FunktionenGrundfunktionen, z. B. Bild einstellungen, Schnappschüsse, lokale Auf nah meErweiterte Funktionen, z.
B. Bild einstellungen, Streamqualität, Push Nachrich tenGrund funktionen, z. B.
Bild einstellungen, Schnappschüsse, lokale Auf nahmeErweiterte Funktionen, z.
B. Bild einstellungen, Streamqualität, Push Nachrich ten KostenKostenlosKostenpflichtigKostenlos Kostenpflichtig SystemiOS, AndroidiOS, AndroidiOS, AndroidiOS, AndroidSie können diese Apps im jeweiligen Store herunterladen.
Allgemeine Sicherheitshinweise und Vorsichtsmaßnahmen CE-Richtlinien Dieses Gerät entspricht den CE-Richtlinien.Wenn Sie eine EGKonformitäts erklärung für dieses Gerät benötigen, schicken Sie bitte eine Anfrage an: info@burg.biz Vorsicht Änderungen und Modifizierungen, die nicht ausdrücklich durch die zuständige Genehmigungsbehörde genehmigt worden sind, können zum Entzug der Genehmigung zum Betreiben des Gerätes führen.
iOS Pro AppAndroid Standard AppAndroid Pro App
20 | Deutsch BURGcam DOME 303BURGcam DOME 303 Deutsch | 21
Allgemeine Sicherheitshinweise – Vor Inbetriebnahme des Gerätes sollte das Handbuch sorgfältig gelesen und als Nachschlagewerk verwahrt werden.
– Vor jeder Reinigung muss das Gerät ausgeschaltet und von der Betriebsspannung getrennt werden. Benutzen Sie für die Reinigung ein feuchtes Tuch.
– Benutzen Sie keine scharfen Reinigungsmittel oder Sprühdosen.
Das Typenschild darf nicht ersetzt werden.
– Benutzen Sie keine Zusatzgeräte, die nicht vom Hersteller des Gerätes empfohlen wurden. Diese können die Funktionalität des Gerätes beeinflussen und schlimmstenfalls Verletzungen und einen elektrischen Schlag herbeiführen oder sogar Feuer auslösen.
– Betreiben Sie das Gerät niemals in der Nähe von Wasser oder anderen Flüssigkeiten.
– Das Gerät sollte an einem sicheren Ort und auf fester Unterlage gemäß den Angaben des Herstellers installiert werden. Schweres Gerät sollte mit großer Sorgfalt transportiert werden. Schnelle Halts, übermäßige Krafteinwirkungen und unebener Boden können die Ursache sein, dass das Gerät zu Boden fällt und schweren Schaden an Personen und anderen Objekten verursacht.
– Eventuell am Gerät befindliche Öffnungen dienen der Entlüftung und schützen das Gerät vor Überhitzung. Diese Öffnungen dürfen niemals zugedeckt oder zugestellt werden. Sorgen Sie dafür, dass das Gerät nicht überhitzt wird.
– Verwenden Sie nur die empfohlene Betriebsspannungsversorgung.
Wenn Sie nicht sicher sind, ob die am Installationsort vorhandene Stromversorgung verwendet werden kann, fragen Sie Ihren Händler.
– Ein Gerät, das von einer polarisierten Stromversorgung versorgt wird, hat meistens als Sicherheitsvorkehrung einen Netzanschlussstecker mit unterschiedlichen Klinken, welche nur auf eine Art und Weise mit der Netzsteckdose verbunden werden können. Versuchen Sie niemals, diese Sicherheitsvorkehrung eines polarisierten Steckers außer Betrieb zu setzen.
– Wenn das Gerät eine Stromversorgung mit Erdungsanschluss erfordert, dann sollte es auch nur an eine entsprechende Netzsteckdose mit Erdungsanschluss angeschlossen werden. Steht eine solche Schuko-Steckdose nicht zur Verfügung, dann sollte sie von einem Elektriker installiert werden.
– Anschlusskabel sollten so verlegt werden, dass man nicht darauf treten kann oder dass sie nicht durch herab fallende Gegenstände beschädigt werden können.
– Bei einem Gewitter oder bei längerer Nutzungspause sollte das Gerät immer von der Betriebsspannung getrennt werden.
Lösen Sie auch andere Kabelverbindungen. Auf diese Weise schützen Sie das Gerät vor Blitzschäden oder Stromstößen.
– Setzen Sie Netzsteckdose und Netzkabel niemals einer Überbelastung aus. Feuer und elektrische Schläge können die Folge sein.
22 | Deutsch BURGcam DOME 303BURGcam DOME 303 Deutsch | 23
– Stecken Sie niemals Gegenstände durch die Öffnungen des Geräts. Sie können Spannungs- führende Teile berühren und einen elektrischen Schlag erhalten.
– Vergießen Sie auch niemals Flüssigkeiten über das Gerät.- Bei Betriebsstörungen oder einem vollständigen Betriebsausfall schalten Sie das Gerät aus und trennen es von der Versorgungsspannung. Versuchen Sie niemals, selbst Wartungs- oder Reparatur arbeiten bei geöffnetem Gehäuse durchzuführen, da Sie sich gefährlichen Spannungen aussetzen. Überlassen Sie Wartungs- oder Reparaturarbeiten ausschließlich qualifizierten Fachwerkstätten.
– Als Ersatzteile dürfen nur Teile verwendet werden, die vom Hersteller zugelassen wurden oder solche, die identische Leistungsdaten aufweisen. Nicht genehmigte Ersatzteile können zu Schäden an Personen (elektrischer Schlag) und Gerät (Feuer) führen.
– Nach jeder Wartung oder Reparatur des Geräts muss das Gerät auf einwandfreien Betrieb überprüft werden.
– Die Installation des Geräts muss den örtlichen Spezifikationen und Vorschriften entsprechen.
– Richten Sie die Kamera nie auf ein Objekt mit hoher Leuchtkraft.
Helle vertikale oder horizontale Linien können auf dem Bildschirm das gesamte Bild überstrahlen. Dieser Nachzieheffekt ist kein Fehler, sondern eine Eigenart der Halbleiter CCD’s, wenn dieser einer starken Lichtquelle direkt ausgesetzt wird.
– Bei Einsatz dieser Kamera an Orten mit stark unterschiedlichen Lichtverhältnissen ist die Blendeneinstellung anzupassen.
– Bitte beachten Sie im Fall der Entsorgung unbrauchbarer Geräte die geltenden gesetzlichen Vorschriften.
Bei Kameras mit einem IR-Scheinwerfer: Bewahren Sie stets einen Abstand von > 1m, um Gesundheitsschäden vorzubeugen.
Schauen Sie nie direkt in den IR-Scheinwerfer hinein, um Augenschäden zu vermeiden.
24 | English BURGcam DOME 303BURGcam DOME 303 English | 2524 | Deutsch BURGcam DOME 303
Entsorgung des Gerätes Sehr geehrter Kunde, bitte helfen Sie Abfall zu vermeiden. Sollten Sie zu einem Zeitpunkt beabsichtigen, dieses Gerät zu entsorgen, denken Sie bitte daran, dass viele Bestandteile dieses Gerätes aus wertvollen Materialien bestehen, welche man recyceln kann.
Wir weisen darauf hin, dass Elektro- und Elektronikgeräte sowie Batterien, nicht über den Hausmüll, sondern getrennt bzw. separat gesammelt werden müssen. Bitte erkundigen Sie sich bei der zuständigen Stelle in Ihrer Stadt / Gemeinde nach Sammelstellen für Elektromüll.
Bei Fragen zur EG-Konformitätserklärung wenden Sie sich bitte an die info@burg.biz.
Bei technischen Fragen zum Produkt lesen Sie bitte die ausführliche Bedie nungsanleitung und beachten Sie die FAQ, die Sie auf folgender Webseite finden: www.burg.biz. Sollten Sie dennoch Fragen haben, können Sie sich gern per E-Mail an uns wenden unter: camera-service@burg.biz Impressum Das Copyright dieser Bedienungsanleitung liegt ausschließlich bei der BURG-WÄCHTER KG. Jegliche Vervielfältigung auch auf elektronischen Datenträgern bedarf der schriftlichen Genehmigung der BURG-WÄCHTER KG. Der Nachdru ck – auch auszugsweise – ist verboten. Irrtum und technische Änderungen vorbehalten.
Alle genannten Firmen- und Produktnamen sind Warenzeichen oder eingetragene Warenzeichen bzw. Marken der jeweiligen Inhaber.
Items included in the delivery 1 x Camera 1 x CD (Config Tool, video player) 1 x 12V DC power adapter 1 x Stencil sticker 1 x Allen wrench 1 x Antenna 1 x Quick installation guide Screws and anchors Special features – Up to 3 megapixel resolution- Remote access via BURG CAM Apps (Android and Apple smartphones and tablets) – Local access via your PC’s or laptop’s web browser- WLAN up to 50m in open space- IR Reichweite bis 30m- Vandal-proof; IK10 classification- Suitable for outdoor applications; IP66 classification- Professional backlight compensation- H.264 / H.264B / H.264H / MJPEG video compression- Ideal professional solution for home applications- Easy to install thanks to WPS- WLAN or LAN operation possible- Recording to local Micro-SD card (max.128 GB) (not included in the delivery)
26 | English BURGcam DOME 303BURGcam DOME 303 English | 27
Dimensions Side viewBottom view All dimensions in mm.
Drawings not true to scale.
Subject to technical changes. Errors excepted.
Ø 110 mm 81 mm Ø 110 mm Connection cables 12 V DC power supply Network
28 | English BURGcam DOME 303BURGcam DOME 303 English | 29
Description WiFi antenna Waterproof ring Reset: Press and hold the button for approx. 8 seconds until the control LED extinguishes in order to reset the camera configurations to factory default settings.
WPS: Press this button once quickly to connect the camera to the corresponding WLAN router.
Micro SD card slot Status indicator light Red: Booting Green slowly flashing: Booting completed; waiting for WiFi connection Green quickly flashing: WiFi connection in progress Green: WiFi connection successful; normal operation Red and green lights flashing alternately: Camera upgrade Red slowly flashing: Network connection failed or disconnected Red quickly flashing: Camera malfunction, booting failed, alarm or SD card malfunction Wall / ceiling mount – Screw off the dome cover from the dome body using the supplied Allen wrench.
– Use the supplied screws, anchors and stencil sticker to fix the dome body in the desired location. Please ensure that the ground is strong enough to carry at least 3x the camera’s weight.
– Loosen the little fixing screw on the lens and adjust the lens position according to your needs. Then tighten the fixing screw again.
– Screw the dome cover back on the dome body.
30 | English BURGcam DOME 303BURGcam DOME 303 English | 31
Installation Preparations – Mount the camera in the desired location. Please ensure that the ground is strong enough to carry at least 3x the camera’s and bracket’s weight. Use the supplied screws / anchors and stencil sticker.
– Use the supplied power adapter to power the camera.- Screw the antenna to the camera.
For camera installation, the following 3 options are available: Option 1 LAN operation – Installation via PC / laptop: – Use a LAN/network cable (not included in the delivery) to connect the camera and your PC / laptop with the network. Your PC / laptop has to be in the same network as the camera.
– Insert the supplied CD into your PC / laptop drive and start the Config Tool.
Next step „Camera selection via Config Tool“ Ceiling or wall Anchors Dome body Screws Dome cover
32 | English BURGcam DOME 303BURGcam DOME 303 English | 33
Option 2
WLAN operation – Installation via smartphone: – Download the BURG CAM App to your smartphone.
– Connect your smartphone to the network via WLAN.
– Start the BURG CAM App on your smartphone and go to the main menu: BURG CAM MOVE
Inbetriebnahme:Getting started: For camera installation, the following 3
options are available: Option 1: LAN operation: Installation via PC/laptop: Use a LAN/network cable (not included in the delivery) to connect the camera and your PC/laptop with the network. Your PC/laptop has to be in the same network as the camera.
Insert the supplied CD into your PC/ laptop drive and start the Config Tool.
Option 2: WLAN/LAN operation: Installation via smartphone: Use a LAN/network cable (not included in the delivery) to connect the camera and your PC/laptop with the network.
Connect your smartphone to the same network via WLAN.
Download the BURG CAM App to your smartphone.
Start the BURG CAM App on your smartphone and go to the main menu: ! ! Device manager
! ! Add device
! ! WIFI configuration Assign any name to the camera.
Scan the QR code of the camera or type in the camera’s serial number manually (you will find these information on the label on the camera or on the label on the packaging box).
Für die Einrichtung der Kamera gibt es 3
unterschiedliche Möglichkeiten: Option 1: LAN Betrieb: Einrichtung mit PC/Laptop: Verwenden Sie ein LAN/Netzwerkkabel (nicht im Lieferumfang enthalten) und verbinden Sie die Kamera und Ihren PC/ Laptop mit dem Netzwerk. Ihr PC/Laptop muss sich im gleichen Netzwerk befinden wie die Kamera.
Legen Sie die beiliegende CD in Ihren PC/Laptop ein und starten Sie das Config Tool.
Option 2:
WLAN/LAN Installation: Einrichtung mit dem Smartphone: Verwenden Sie ein LAN/Netzwerkkabel (nicht im Lieferumfang enthalten) und verbinden Sie die Kamera mit dem Netzwerk.
Verbinden Sie Ihr Smartphone mit demselben Netzwerk über WLAN.
Installieren Sie die BURG CAM App auf Ihrem Smartphone.
Starten Sie die BURG CAM App auf Ihrem Smartphone und wählen Sie im Hauptmenü:
! ! Gerätemanager
! ! Gerät hinzufügen
! ! WIFI Konfiguration Vergeben Sie einen beliebigen Namen für die Kamera.
Scannen Sie den QR-Code der Kamera oder tippen Sie die Seriennummer der Kamera manuell ein (Etikett auf Verpackung/Kamera).
!5
Device manager BURG CAM MOVE
Inbetriebnahme:Getting started: For camera installation, the following 3
options are available: Option 1: LAN operation: Installation via PC/laptop: Use a LAN/network cable (not included in the delivery) to connect the camera and your PC/laptop with the network. Your PC/laptop has to be in the same network as the camera.
Insert the supplied CD into your PC/ laptop drive and start the Config Tool.
Option 2: WLAN/LAN operation: Installation via smartphone: Use a LAN/network cable (not included in the delivery) to connect the camera and your PC/laptop with the network.
Connect your smartphone to the same network via WLAN.
Download the BURG CAM App to your smartphone.
Start the BURG CAM App on your smartphone and go to the main menu: ! ! Device manager
! ! Add device
! ! WIFI configuration Assign any name to the camera.
Scan the QR code of the camera or type in the camera’s serial number manually (you will find these information on the label on the camera or on the label on the packaging box).
Für die Einrichtung der Kamera gibt es 3
unterschiedliche Möglichkeiten: Option 1: LAN Betrieb: Einrichtung mit PC/Laptop: Verwenden Sie ein LAN/Netzwerkkabel (nicht im Lieferumfang enthalten) und verbinden Sie die Kamera und Ihren PC/ Laptop mit dem Netzwerk. Ihr PC/Laptop muss sich im gleichen Netzwerk befinden wie die Kamera.
Legen Sie die beiliegende CD in Ihren PC/Laptop ein und starten Sie das Config Tool.
Option 2:
WLAN/LAN Installation: Einrichtung mit dem Smartphone: Verwenden Sie ein LAN/Netzwerkkabel (nicht im Lieferumfang enthalten) und verbinden Sie die Kamera mit dem Netzwerk.
Verbinden Sie Ihr Smartphone mit demselben Netzwerk über WLAN.
Installieren Sie die BURG CAM App auf Ihrem Smartphone.
Starten Sie die BURG CAM App auf Ihrem Smartphone und wählen Sie im Hauptmenü:
! ! Gerätemanager
! ! Gerät hinzufügen
! ! WIFI Konfiguration Vergeben Sie einen beliebigen Namen für die Kamera.
Scannen Sie den QR-Code der Kamera oder tippen Sie die Seriennummer der Kamera manuell ein (Etikett auf Verpackung/Kamera).
!5
Add device BURG CAM MOVE
Inbetriebnahme:Getting started: For camera installation, the following 3
options are available: Option 1: LAN operation: Installation via PC/laptop: Use a LAN/network cable (not included in the delivery) to connect the camera and your PC/laptop with the network. Your PC/laptop has to be in the same network as the camera.
Insert the supplied CD into your PC/ laptop drive and start the Config Tool.
Option 2: WLAN/LAN operation: Installation via smartphone: Use a LAN/network cable (not included in the delivery) to connect the camera and your PC/laptop with the network.
Connect your smartphone to the same network via WLAN.
Download the BURG CAM App to your smartphone.
Start the BURG CAM App on your smartphone and go to the main menu: ! ! Device manager
! ! Add device
! ! WIFI configuration Assign any name to the camera.
Scan the QR code of the camera or type in the camera’s serial number manually (you will find these information on the label on the camera or on the label on the packaging box).
Für die Einrichtung der Kamera gibt es 3
unterschiedliche Möglichkeiten: Option 1: LAN Betrieb: Einrichtung mit PC/Laptop: Verwenden Sie ein LAN/Netzwerkkabel (nicht im Lieferumfang enthalten) und verbinden Sie die Kamera und Ihren PC/ Laptop mit dem Netzwerk. Ihr PC/Laptop muss sich im gleichen Netzwerk befinden wie die Kamera.
Legen Sie die beiliegende CD in Ihren PC/Laptop ein und starten Sie das Config Tool.
Option 2:
WLAN/LAN Installation: Einrichtung mit dem Smartphone: Verwenden Sie ein LAN/Netzwerkkabel (nicht im Lieferumfang enthalten) und verbinden Sie die Kamera mit dem Netzwerk.
Verbinden Sie Ihr Smartphone mit demselben Netzwerk über WLAN.
Installieren Sie die BURG CAM App auf Ihrem Smartphone.
Starten Sie die BURG CAM App auf Ihrem Smartphone und wählen Sie im Hauptmenü:
! ! Gerätemanager
! ! Gerät hinzufügen
! ! WIFI Konfiguration Vergeben Sie einen beliebigen Namen für die Kamera.
Scannen Sie den QR-Code der Kamera oder tippen Sie die Seriennummer der Kamera manuell ein (Etikett auf Verpackung/Kamera).
!5
WIFI configuration – Assign any name to the camera.
– Scan the QR code of the camera or type in the camera’s serial number manually (you will find these information on the label on the camera / packaging box).
– When you use the application for the first time, please use the following default login data: User name: admin Password: 9999
– Touch “Next” and enter the WLANpassword of your network.
– Touch “Next” and wait for a confirmation that the camera has successfully connected to the WLAN node.Option 3
WLAN / WPS installation: – Depending on the type of WLAN router you are using, activate the WPS / WLAN function either by pushing the respective WPS / WLAN button on the router or by adjusting the appropriate WLAN settings in your router. It is important that the different devices are allowed to communicate with each other (disable the guest access).
– Quickly press the reset/WPS button on the camera (max. 2 seconds) to connect the camera with the corresponding WLAN router.
Note: Only press this button quickly. If you press and hold it longer (ca. 8 seconds) the camera will perform a reset.
– The router will assign an IP-address to the camera.
– Insert the supplied CD into your PC / laptop drive and start the Config Tool.
34 | English BURGcam DOME 303BURGcam DOME 303 English | 35
Camera selection via Config Tool – The Config Tool identifies all devices within the same network and lists them.
– Select your desired device from the list and tap the Browser icon (right).
– The login window is displayed.
Login In the login window, please enter the default login data: User name: admin Password: 9999
It is highly recommended to change the default user name and password after you have logged in. Please change it here: Setup System Account Description of camera menu Once you have logged in, you will see the camera’s live image and the menu items.
1. LIVE
(Stream, Image setting, Image format) 2. PLAYBACK
3. SETTINGS
(Camera, Network, Event, Storage, System, Information) 4. LOGOUT
You will find detailed explanations on the menu items in the user manual.
36 | English BURGcam DOME 303BURGcam DOME 303 English | 37
Technical specifications Camera type WIFI IR dome camera for indoor and outdoor applications Sensor1/3” 3 MP Progressive Scan CMOS
Resolution3 MP: 2048 x 1536 / 2304 x 1296
1080p: 1920 x 1080 (= Full HD) 720p: 1280 x 720
D1: 704 x 576 / 704 x 480
CIF: 352 x 288 / 352 x 240
Frame rate20 fps @ 3MP, 25/30fps @ 1080p Bit rate4 Kbps – 8192 Kbps IR LEDsUp to 30m range* IR cut filterMechanical Lens2.8 mm F2.0 Fixed lens Angle of viewHorizontal: 90° White balanceAuto WLANIEEE802.11b/g/n LAN (RJ-45)10/100Base-T
Supported protocolsIPv4/IPv6, HTTP, HTTPS, TCP/IP, UDP, UPnP, ICMP, IGMP, RTSP, RTP, SMTP, NTP, DHCP, DNS, PPPOE, DDNS, FTP, IP Filter, QoS
Micro-SD card max. 128 GB; for recordings and snapshots InstallationWall or ceiling mount Voltage12V DC
Power consumption< 4.5 W
Operating temperature-30°C to +60°C
ClassificationIP66, IK10
DimensionsØ 110 x 81 mm Weight0.47 kg Additional features: Backlight compensationBLC / HLC / DWDR
Noise reduction3D
Privacy zones4
* Note: The range of the built-in IR LEDs strongly depend on the location and the surroundings. Strongly absorbent surfaces, e.g. dark, rough structures (floor, lawn or asphalt) may lead to a considerable reduction of the maximum range.
Subject to technical changes without notice. Errors excepted.
38 | English BURGcam DOME 303BURGcam DOME 303 English | 39
Detailed user manual The purpose of this quick installation guide is to start the device in an easy and convenient way. Further detailed explanations and descriptions of the various functions are available in the user manual which you can download as pdf file from our website: www.burg.biz service & downloads Users manual Assembly instructions Video security Alternatively, for quick access to the user manual, you can scan the QR-code below to view the user manual on your smartphone or tablet. This QR-code will also provide additional information (FAQ).
QR-code for user manual/further information in English: „Burg Cam“ App for P2P applications Using the “Burg Cam” App, you can call-up and control the device by your smartphone or tablet.
The following Apps are available for smartphone and tablets: a free-ofcharge version or the “Pro” version with costs and additional features.
App NameBurg CamBurg Cam Pro Apps + E-MAPBurg Cam HD
Burg Cam HD Pro DeviceSmartphoneSmartphoneTabletTablet FunctionsBasic functions, e.g. image adjustment, snapshots, local recordingAdvanced functions, e.g. image adjustment, stream quality, push notification, EmapBasic functions, e.g. image adjustment, snapshots, local recording Advanced functions, e.g. image adjustment, stream quality, push notification, E-map CostsFree-ofchargeWith costs Free-ofchargeWith costs SystemiOS, AndroidiOS, AndroidiOS, AndroidiOS, Android
40 | English BURGcam DOME 303BURGcam DOME 303 English | 41
You can download these Apps in the respective stores.
General safety precautions and safety instructions CE compliance This appliance complies with the CE guidelines. If you require an EC
Declaration of Conformity for this device, please send a request to: info@burg.biz Attention Any changes or modifications to this appliance which have not been explicitly approved of by the respective regulatory authority, may lead to a prohibition of usage of this appliance.
iOS Pro AppAndroid Standard AppAndroid Pro App Safety instructions – Before operating the appliance, please read the manual carefully and retain it for further reference.
– Before cleaning the appliance, it has to be switched off and unplugged from the power outlet. Wipe the appliance with a soft damp cloth.
– Do not use harsh cleansers or aerosols for cleaning. The type label may not be replaced.
– Do not use attachments unless recommended by the manufacturer as they may affect the functionality of the appliance and result in the risk of fire, electric shock or injury.
– Never install the appliance in areas exposed to water or other liquids.
– The appliance has to be installed in a safe and stable location which is able to carry the weight of the appliance. Quick stops, excessive force, and uneven surfaces may cause the appliance to fall causing serious injury to persons and damage to objects.
– Openings in the appliance, if any, are provided for ventilation to ensure reliable operation of the appliance and to protect if from overheating. These openings must not be covered or blocked.
Please make sure that the appliance does not overheat.
– The appliance should only be operated from the type of power source indicated on the marking label. If you are not sure of the type of power supplied at the installation location, please contact your local dealer.
42 | English BURGcam DOME 303BURGcam DOME 303 English | 43
– An appliance which is powered through a polarized plug (a plug with one blade wider than the other) will fit into the power outlet only one way. This is a safety feature. If you are unable to insert the plug into the outlet, try reversing the plug. Do not defeat the safety purpose of the polarized plug.
– If the appliance is powered through a grounding-type plug, the plug will only fit into a grounding-type power outlet. This is a safety feature. If your outlet does not have the grounding plug receptacle, contact your local electrician.
Route power cords and cables in a manner to protect them from damage by being walked on or pinched by items places upon or against them.
– For protection of the appliance during a lightning storm or when it is left unattended and unused for a longer period, unplug the appliance from the wall outlet. Disconnect any antennas or cable systems that may be connected to the appliance. This will prevent damage to the appliance due to lightning or power-line surges.
– Do not overload wall outlets and extension cords as this can result in a risk of fire or electric shock.
– Never insert items into the openings of the appliance.
They may touch parts under electric current which may cause an electric shock.
– Never pour any liquids over the appliance.- In case of any operating interruption or a complete operating failure please switch off the appliance and disconnect it from the wall outlet. Never attempt to service or repair the appliance yourself, as opening or removing covers may expose you to dangerous voltage or other hazards. Refer all servicing to qualified service personnel.
– When replacement parts are required, be sure that the service technician uses replacements parts specified by the manufacturer or that have the same characteristics as the original part.
Unauthorized substitutions may result in fire, electric shock or other hazards.
– Upon completion of any service or repairs to the appliance, ask the service technician to perform safety checks to verify that the appliance is in proper operating condition.
– The appliance must only be installed by qualified service personnel and has to comply with local specifications and regulations.
– Never point the camera at an object with a high degree of luminance. Bright vertical or horizontal lines can result in a distortion (outshine) of the entire image on the monitor. This artifact is not an error but a particularity of semiconductor CCDs when they are directly exposed to a powerful light source.
– At the installation site, the camera has to be adjusted to the given light.
– Please respect the local legal regulations on waste if you need to dispose of discarded appliances.
For cameras equipped with IR LEDs: Please make sure to always keep a distance of > 1m to avoid damages to your health. Never look directly into the IR-LEDs – this may cause eye damages!
44 | English BURGcam DOME 303BURGcam DOME 303 | 45
Disposal Dear customer Please help us avoid unnecessary waste. Should you intend to dispose of this device at any time, please remember that many components of this device contain valuable materials, which can be recycled.
Please be aware that electrical and electronic equipment and batteries shall not be disposed of as household waste, but rather collected separately.
Please obtain information on the collecting points for electrical waste from the responsible authority of you municipality.
If you have any questions concerning the EC declaration of conformity, please use info@burg.biz If you have technical questions about this device, please read the detailed user manual and the FAQ sheet which you will find on the following website: www.burg.biz.If, however, you still have questions, please send an e-mail to: camera-service@burg.biz Copyright All rights reserved. This publication may not be reproduced, stored in a retrieval system or transmitted, in any form or by any means (electronic, mechanical, photocopying, recording or otherwise), without the written prior permission of BURG-WÄCHTER KG. No reproduction of any part or excerpts thereof are permitted. Errors excepted. Specifications are subject to change without notice for quality improvement. All companies or products mentioned in this publication are trademarks, registered trademarks or brands of the respective company.
Notizen
BURGcam DOME 303 | 47
46 | BURGcam DOME 303
NotizenNotizen
www.burg.biz BURG-WÄCHTER KG
Altenhofer Weg 15
58300 Wetter Germany info@burg.biz www.burg.biz BA/MA BURGcam DOME 303 cko/sfi/eba 08 / 2016
Podmienky používania dokumentácie produktu
Súvisiace produkty
-
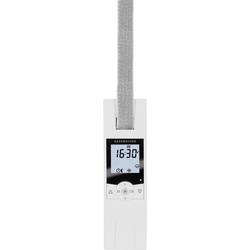
Pod omietku Rademacher Rademacher DuoFern RolloTron Comfort DuoFern UW 1800 16234511
€192.66 Overiť cenu -
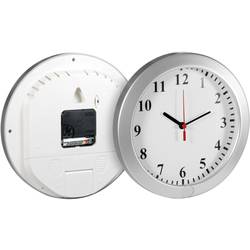
Bezpečnostná kamera v nástenných hodinách Technaxx 4218, 1280 x 720 pix, 32 GB
€76.83 Overiť cenu -

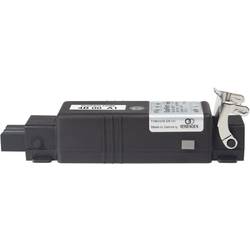
Diaľkové ovládanie Rademacher Rademacher DuoFern Standaard 9491-2 32480361, 1-kanálový
€65.25 Overiť cenu -
Rademacher Rademacher DuoFern DuoFern 9477 35000864
€115.44 Overiť cenu